Pages

Monday, January 23, 2012

Girls Love FLOWERS


2012-01-18_20-29-14_295

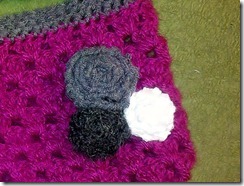
Rosettes are lovely and really simple to make! you can add them to headbands, purses, blankets, scarves… really Anything! This is a quick tutorial of how to create these wonderful accents!


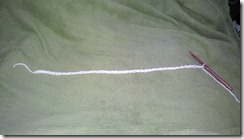
First start out by making a chain. the length of the chain is really up to you. The longer the chain the bigger the rosette.

2012-01-21_10-43-21_956

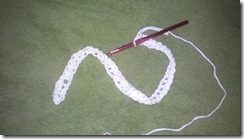
Once you have you chain long enough you will start in the second stitch from your hook and single crochet the entire length of the chain.

2012-01-21_10-48-22_442


Once you have completed you single crochets you will do a reverse single crochet from left you right working in each stitch

Reverse Crochet Stitch

Now to finish your rosette

Finishing your rosette


Enjoy Life One Day At A Time!

Kelly

Saturday, January 21, 2012

Fabulous FOB

Good morning everyone. I have been enjoying the white snow scape outside of my craft room window, while crafting like crazy! I really enjoy being creative and sharing it all on this blog. Today (because the creative juices are flowing) I will be posting 2 crafts. 1 - a key fob ( LOVE THIS) and 2 (later) the crochet rosette that I mentioned yesterday to go alone with the purse.

When I first moved to our nice little town I discovered there are alot of fun little places in this fun little town and one of my favs has been Martha and Me. You see, Martha is the owner of the store, a very nice lady who loves treasures of all sorts and sells them in her fun little store. And Me is her dog.... The cutest little pup, that you can always find sitting at her feet eyeing the ankles of everyone that walks into her establishment. One day I visited Martha and Me and found the most genius of things ( I moved here from the middle of no where so these were very new to me) A beautifully handcrafted custom KEY FOB. So I purchased one- If was covered in shamrocks which are the mascot of our schools, so naturally I needed someway to show my shamrock pride. I paid $13 + tax for this nifty thing and just this past week decided to try my hand at making one. I did, and it turned out great! What great gifts, for teachers, friends, Secret Moms at our local moms group ;), really anyone! ( my husband has even asked me to make a Harley Davidson Key Fob for his new sportster) so here ya go the instructions on how to make your own custom KEY FOBS. Try to keep up it is terribly diffi.... what am I saying NO IT IS NOT! LOL ENJOY!


First what you will need is
1. Woven Belting
2. Ribbon
3. Key Fob Hardware
4. a sewing Machine


I cut a 12 in piece of the belting and the ribbon
then lay the ribbon on top of the belting sew down each side of the ribbon
Fold the material in half and sew together at the ends
slide on the key fob hardware and clamp with pliers.


Tada!!! you have an easy fun gift that anyone would like.

you can also add another layer of ribbon if you like. At Hobby Lobby I found some wonderful grosgrain ribbon with ruffles on the edge that would look great under the ribbon. If you have an embroidery machine you could also add a name or monogram to the Fob. Just have fun with it and take it ONE DAY AT A TIME!!!

Kelly

Friday, January 20, 2012

Cutie Patootie Purse


Well it has been a little while since I have posted anything thing, so sorry about the delay. I have been super busy with crafts and have tons to share with you. So to get right to the point. Today I am sharing this adorable purse for you. The great thing about this is you can adjust the pattern to make it as big or as little as you like. This one I made for my daughter to hold her PSP and DS. She loves it! I am in the process of making one for myself using lovely browns and creams and am adding a lining to it. I will post it once I am finished and do another pattern to go over making the lining and attaching it. But for now enjoy this lovely little handbag and Please if you create one Send me a pic I would love to see you work!


TIPS:
Join all rounds.
Do not turn after rounds on the bag.


Starting out: Ch 51 (or more depending on the size you are wanting to make).


Row 1: Work 1 sc in 2nd ch from hook. Continue working sc in each ch st to end. Join w/ sl st in 1st sc. (50 sc) You will now be working in rounds.


Rnd 1: Work Beginning Shell in same st as join. {Skip 2 stitches, then work Shell in the next st.} Repeat between {} around. Join in top of ch 3. (17 Shells)


Rnd 2: Sl St in each dc of shell into sp between first two shells. Work Beginning Shell. {Work Shell in space between next shell.} Repeat between {} to end. Join in top of ch 3. (17 Shells)


Rnd 3-8: Repeat round 2.


Rnd 9-10: ( This is when I changed colors but you can use all the same color if you would like)  Ch 1. Sc in next st and in each st to end. Join in top of first sc. (50 sc)


Rnd 11: Ch 1. Sc in next 5 st. Ch 15. Count 15 and attach to 16th sc. Sc in next 9 st. Ch 15. Count 15 and attach to 16th sc. Sc in next 4 stitches. Join in top of first sc. (50 sc)


Rnd 12: Ch 1. Sc in next st and in each st across including each ch stitch to end. Join in top of first sc. (50 sc)
Rnd 13-14: Ch 1. Sc in next st and in each st to end. Join in top of first sc.


Finish off. Whip stitch bottom seam of bag together. Weave in ends.

Tomorrow I will go over  how to make the rosettes and a few other flowers.

enjoy and Remember Take it ONE DAY AT A TIME!

Kelly

Monday, January 9, 2012

The fantastic Broomstick Lace Crochet Stitch

I know yesterday I said we would be doing a sewing project -the wall pouch, but this morning I woke up not feeling very well and decided not to pull out the sewing machine. I do promise though I will do it as soon as I am feeling better! So instead as I lay on the sofa (or davenport and my dear grandmother refers to it) I pulled out my crochet hook and decided to learn something new, and boy did I! As I lay feeling completely ill and enjoy the quiet of all 3 children at school and hubby at work I explored the exotic broomstick lace stitch. I love the fanned look of it. The twists and turns of it are lovely.So once I mastered this new stitch, of course I had to make something LOL! And what better than a bracelet to match my infinity scarf from yesterday. Oh and once again in the clearance isle at Hobby Lobby I found a wonderful coral yarn, just looking at it makes me want to take an exotic vacation. From this yarn I made a Broomstick lace phone case. (and from it got some inspiration for another project for another day.)


Here is a great tutorial for the Broomstick Lace Stitch
Once you have learned this stitch I hope that you love it as much as I do!


Bracelet pattern

Chain 16 turn and Single crochet 15
then working in multiples of 5 start your broomstick lace stitch (you will end up with 3 full broomstick stitches) repeat for 7 rows and then add 3 buttons to your beginning side and there you have it! LOVE it! try this stitch with different weight yarns to get different looks.


Phone Case
(this one is a little bit more difficult and size depends on what phone you are using)
chain 11 turn and single crochet 10
turn and complete 2 broomstick lace stitches then turn and do 1 broomstick lace stitch with all 10 loops
repeat this for 7 rows and then i added some chain scallop around the edge this is completely up to you. just create a chain and attach every 6. once complete finish off weave in ends.
For the pocket I started with a single crochet into the bottom of the case and then completed 8 rows of single crochet and attached on the sides. it was pretty easy. and I love the result!

well that is all for today I hope that you are enjoying my new blog and that you are learning new things, ONE DAY AT A TIME.

Kelly

Sunday, January 8, 2012

Day 1- Crochet- Infinity Ruffle scarf!

So as I was walking the yarn isles of Hobby Lobby I happened along 2 fellow crocheters mingling amongst the wool and sock yarn discussing things like weight, yards and stitches. Being the social butterfly that I am I asked a simple question do you crochet or knit both of them looked at me like I had 4 heads and said, "crochet" (it should have had a DUH! at the end LOL). Anyway, we all began talking about our current projects and the younger of the 2 ladies showed me her infinity scarf, it was cute and I love the concept. So as I moved on my merry way contemplating this scarf I stumbled upon the glorious CLEARANCE ISLE, I looked down and to my surprise saw the most beautiful color of purple yarn it was so rich and royal. Without thinking I scooped it up and new exactly what I would do with this wonderful fiber. I knew that an infinity scarf would probably be the easiest thing I have ever made and oh, was I right. Super Easy! But as looked at my new accessory in the mirror perfectly draped around my neck I thought to myself  it needs a little something. So I sat and began adding crocheted cream ruffles.


It was an easy process just time consuming, but the result was incredible!  and now I will share the pattern with you. this is a great project for anyone from beginner to master. Find your flow and take it One day at a time.


Pattern-

sc= Single Crochet
dc= Double crochet
ch= Chain
sl st= Slip Stitch


Scarf-
R1- chain 20 turn
R2- dc in each stitch ch 1 turn
R3- sc in each stitch ch 3 turn
R4-85 repeat R2 and R3
hold ends together and sc through both layers to attach. leave 4 inch strand weave in to finish

Ruffles-
R1- sc along edge of scarf
R2- "chain 3, 2 dc in next stitch chain 3 sl st into next stitch"
"   " repeat full length of scarf.
finish off and weave in ends.

Now how easy was that! and now you have a beautiful new scarf that will be the envy of all your friends!

Tomorrow we will be making a Wall pouch! cant wait!

Kelly

Thursday, January 5, 2012

Lets get started!

As of late I have been utterly obsessed with crafts and DIY and I want to share! My mind tends to wonder and I loose focus quickly resulting in many interests and fun things learned. My crafty quest started about 6 months ago when I purchased my very first sewing machine. I have yet to master this art but I am learning as I go. I have gotten many tricks and techniques under my belt and taking one day at a time, I will post my new passions. I swear, I have a gypsy soul and am constantly changing things in my life. I easily become unsettled and feel the urge to move on, BUT for stability for my 3 children I am channeling those gypsy tendencies into my hands and changing how I use them, often. Who am I? well my name is Kelly but what is in a name it is not who I am, it is the brand that I was given. I believe that a person is made up of many more things than just a name. So again... Who am I? I am a mother of 3 wonderfully bubbly children, two boys and a girl. They are my world! I am the wife of an amazing, hard working man. He is my rock and almost 12 years ago he ignited a passion inside of me that still burns to this day!  I am a daughter, my parents have taught me so much through the years and I would hate to stop learning now that I am an adult. I am a photographer, a cake decorator, a crocheter, a jewelry maker, a seamstress (still trying to master this), a writer, a singer, and many many more things that you will soon learn. through this blog I want to share my creativity and my passion for working with my hands. Making things from my heart. So please enjoy all that I have to share and lets just take it One Day At A Time! ( later I will tell you the meaning behind this quote but not right now, it hurts to much)